 |
 |
 |
 |
 |
 |
 |
 |
|
|
|
|
|
|
|
|
Tips on Digitally Imaging Fishes
I do not consider myself an expert at digital photography. However, I do have experience taking useful images of fish specimens. Below are some recommendations for equipment and techniques. The best way to learn how to take good digital images is through trial and error. Comments and suggestions on imaging specimens are welcome and should be sent to: sabaj@acnatsci.org
Cameras — The Nikon Coolpix 4500 is a reasonably priced camera (less than $500 USD) that will render useful digital images of fish specimens. The minimum standards for Image Size and Quality are based on features offered by this model. Another camera that comes highly recommeded for lab use is the Nikon D100 (about $1500 USD) with which you can change lenses (purchased separately). The Nikon D1X (about $3800 USD)is a newer model with that offers a more sturdy body for field use, however the image quality is said to be about the same as that of the Nikon D100.
Recently (Summer 2004) I bought a Nikon Coolpix 8700 with which I am very happy. Most of the images on the Peru Expedition website were taken with a Nikon Coolpix 8700.
Camera Settings — Digital cameras have a variety of "settings". The following settings are recommended for use with the Nikon Coolpix 4500
1. Shooting Mode: Manual ("M"). In manual mode, you control both shutter speed & aperture. I try to keep the aperture around 6 or 7 to maximize depth of field and adjust the shutter speed to allow for appropriate light. It is best to take several images using different shutter speeds (e.g., 1/8, 1/15, 1/30 of a second) and then select the best image after viewing on a computer (the camera monitor is not the best way to determine the best image). You will need to mount your camera on a copy stand or tripod to use shutter speeds of 1/30 second or slower.
2. White Balance: This important setting is easy to forget. A digital camera can adjust colors according to lighting so that colors that appear white to the human eye also appear white when viewed in the final photograph. If you use an incandescent light source, you will need to set your camera for such to improve color reproduction. Unfortunately, even if you set the white balance accordingly, the colors may appear "off" (usually too red) if you use a polarizing filter. This will require you to hold the specimen in front of the image as it is displayed on a computer and adjust the color balance and saturation levels using imaging software like Adobe Photoshop (see image manipulation techniques).
3. Focus & Zoom: Most specimens will require you to set the camera for "Macro close-up". In the Macro mode, is it ESSENTIAL that you SLIGHTLY zoom in on specimen by pressing the zoom button ("T" on Nikon cameras) once or twice. The Nikon Coolpix cameras seems to have trouble autofocusing in the Macro mode unless the zoom is used. The height of the camera above the specimen should be such that the specimen fills 90-95% of the entire image when the minimum degree of zoom is used. Another useful feature available on Nikon cameras is the "AF Area Mode" under Focus Options. This will give you a set of brackets on the camera monitor that allows you to select the specific region (top, bottom, left, right, center) on which the camera will autofocus. With this feature, I select the region closest to the specimen's eye (for lateral views) and avoid focusing on parts of the specimen that project upwards (e.g., dorsal fin spine). Also, one should take multiple shots at a variety of exposures (especially for small specimens) to ensure the capture of at least one good image. Some photos are likely to be in better focus than others (quirk of digital photography). Since this is digital photography, there is no excuse not to take multiple images (i.e., "developing" the photos is free!).
4. Flash: using a flash can yield unpredictable results when imaging wet specimens positioned on a glass table. If your specimen is well-illuminated, you will not need to use a flash.
Lens — Wet specimens produce a distracting glare when imaged in air and illuminated with unpolarized light. Such glare can be minimized by fitting your camera lens with a rotating polarizing filter. As you view the specimen in the monitor, rotate the polarizing lens to a position that minimizes glare. You can eliminate glare entirely by fitting your light sources with polarizing filters.
Positioning Specimen — As previously mentioned, full lateral, dorsal and ventral views are needed and care should be taken to align the specimen with the cameral lens. When shooting specimens in open air, use modeling clay to help immobilize the specimen in a particular position AND when doing so, please try to keep the clay hidden from view when possible. Also, if the pectoral fin fines are folded against the body, try gently twisting the and pulling the spines away from the body when imaging dorsal and ventral views (pectoral fins should be folded in lateral view when possible).
It is also desirable place the specimen on a pane of clean sturdy glass elevated 15-18 cm above the background. Doing so allows you to use matte board for the background and substitute backgrounds quickly. This also reduces the appearance of harsh shadows on the background.
The best way (in my opinion) to shoot specimens in the field or in the lab is with a photo tank or "squeeze box" filled with water (see below). This is a bit more labor intensive and will not work for all specimens (e.g., very large or badly contorted specimens). However, the results can be quite impressive, especially for catfishes because the water gives the barbels and fins a more "natural" look.
Copy Stand — A copy stand with mounts for light bulbs is recommended. A copy stand with a camera mount that can be adjusted to a maximum height of 60 cm will allow you to photograph specimens up to 40 cm total length if the specimen is positioned on a pane of glass elevated 15-18 cm above the base of the copy stand.
Lighting — No flash is necessary if your subject is well illuminated with 2 to 4 high-watt bulbs (e.g., 300 Watt, 100 Volt flood lamps).
Backgrounds — Black, dark gray or dull blue is recommended. This is somewhat dependent on your preference.
Post-capture Image Manipulation (click here for more detailed information on manipulating digital images)
I currently use Adobe Photoshop to crop images, compose plates of multiple images, clean or adjust the color of the background, and adjust brightness/contrast, color balance and color saturation. I believe that the Adobe Photoshop Elements (ca. $100 USD) offers all of these features.
If you use natural sunlight to illuminate your subject, the colors reproduced in your digital image are usually accurate and no color manipulation is necessary. If you use incandescent bulbs to illuminate your subject, the colors reproduce well if you mount the specimen in a glass photo tank filled with water, do not use lens filters (e.g., polarizer) and set your camera's white balance to incandescent. Slightly enhancing the contrast in Photoshop usually yeilds a better-looking digital image.
If you photograph your specimens in air using incandescent light and a polarizing filter (to reduce glare), the colors in your digital image will be "off" or somewhat inaccurate (usually appear too red). The "autolevel adjustment" feature of Photoshop can be useful to correct for colors (best done while viewing specimen in hand). To give it a try, open your image and under the IMAGE heading select "Adjustments", then "Autolevels". The color of your image will now appear modified...probably more than you desire. Next go the EDIT heading and select "Fade autolevels". You should be given the opportunity to adjust the opacity of the autolevel (from 100% to 90, 50, 11%, etc.). By doing so, you can modify the appearance of your image to more closely match your subject. Similar results can be obtained using the Adjustment/Auto Color option under IMAGE heading. Try them both to see which method yields the most accurate image. Adjusting the Brightness/Contrast, Color Balance, and Hue Saturation can also help create a more true-to-life image. But, it can also ruin a perfectly good image if you are not careful. So, best to save your original image as captured (i.e., unmodified) and a second copy as modified.
The cloning stamp tool in Photoshop is useful for cleaning up inconsistencies in the background.
 |
|
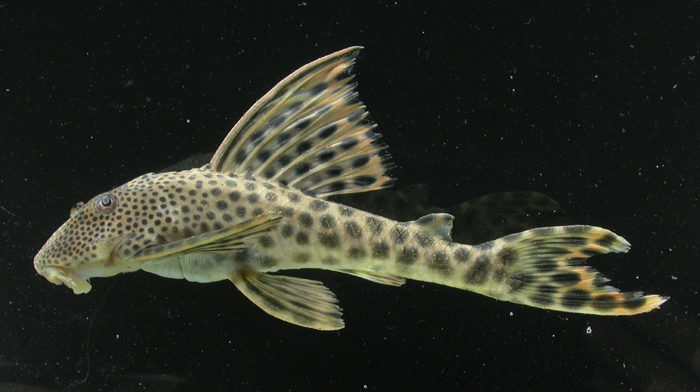
Original image as captured (specimen in photo tank, illuminated with natural sun light)
with Nikon Coolpix 4500 set on fine. |
 |
|
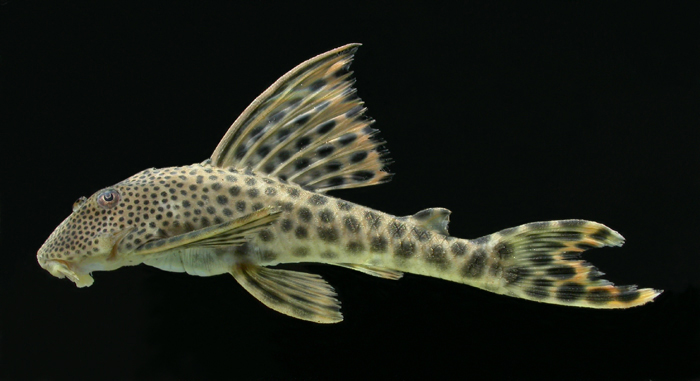
Same image after using cloning stamp tool to clean up background
(contrast slightly enhanced, color levels not manipulated) |
Photo Tank — The glass photo tank is a wonderfully simple way to photograph fishes and has been used by many ichthyologists for decades. You can assemble a photo tank from custom cut pieces sealed together with clear silicone. Have the glass cutter sand the edges of the glass for a smooth feel. Five pieces are used for the tank and a 6th "free" pane of glass is needed to pin (immobilize) the specimen in the photo tank. Some people mount pins on the free pane of glass to help immobilize the specimen. This is not necessary, if you have enough patience.
One item that is absolutely necessary is a "blind" (black piece of cardboard or spongeboard) with a circular cut-out fitted to your camera lens. This prevents the front glass of the photo tank from reflecting your image. Secondly, be sure to use deionized or distilled or bottled water when filling. Tap water holds a lot of gas that will quickly accumulate as bubbles on your specimen (unless tap water kept overnight in an open container).
The two following sizes of tanks have worked well for me, but you can design larger or smaller ones to suit your needs.
Small size tank (good for fieldwork, fits nicely in Pelican case)
accommodates specimens up to 2 1/2 inches wide and about 12 inches total length
| 2 pieces | 2 1/2 x 10 inches | 1/4 inch thickness | sides |
| 1 piece | 3 x 13 1/2 inches | 1/4 inch thickness | bottom |
| 1 piece | 10 x 13 1/2 inches | 1/4 inch thickness | back |
| 1 piece | 10 x 13 1/2 inches | 1/8 inch thickness | front (thinner for focusing) |
| 1 piece | 12 7/8 x 10 1/4 inches | 1/8 inch thickness | free pane |
Large size tank (good for labwork)
accommodates specimens up to 3 inches wide and about 14 1/2 inches total length
| 2 pieces | 3 x 12 inches | 1/4 inch thickness | sides |
| 1 piece | 3 1/2 x 16 inches | 1/4 inch thickness | bottom |
| 2 pieces | 12 x 16 inches | 1/4 inch thickness | front and back |
| 1 piece | 15 1/4 x 12 inches | 1/8 inch thickness | free pane |
 |
|
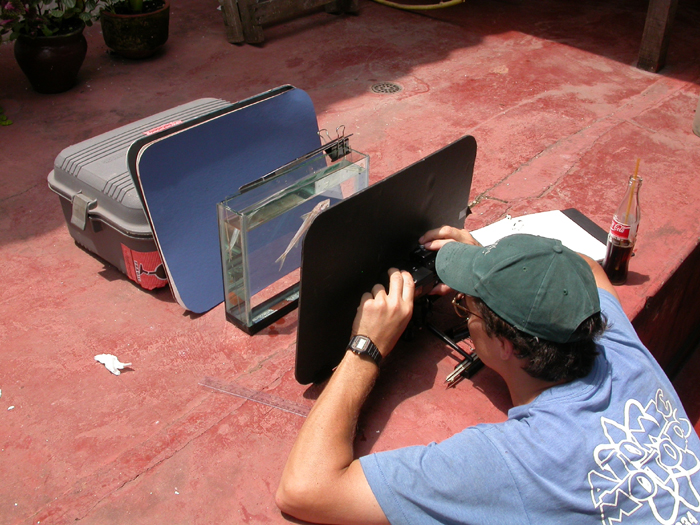
Simple photo tank set up (small size).
|
 |
|
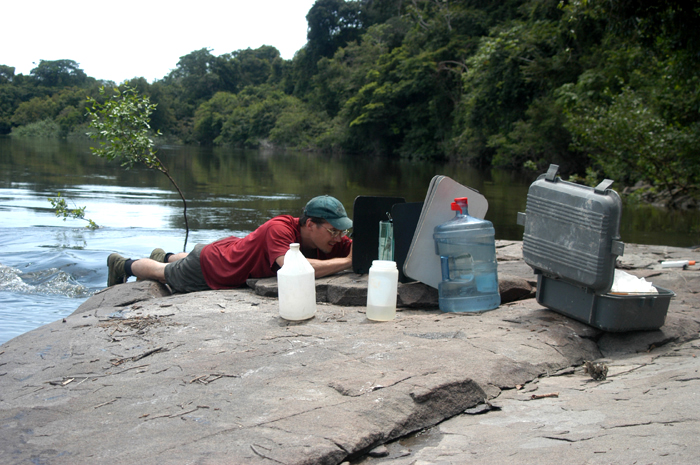
Streamside photo tank set up. When travelling it is a good idea to have a supply of clean clear water to fill the tank.
|
 |
|
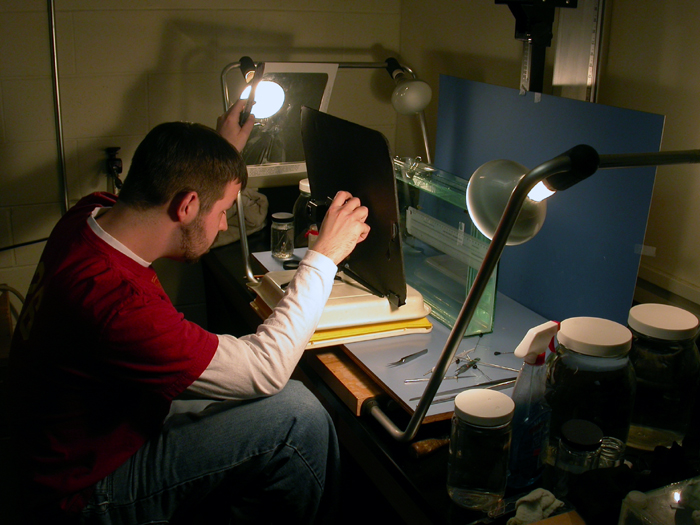
Kyle Luckenbill using a photo tank in the lab to shoot a small (ca. 30 mm SL) specimen. A polarizing filter held over the source lamp reduces unwanted glare off specimen. Camera is mounted on a mini tripod.
|
 |
|
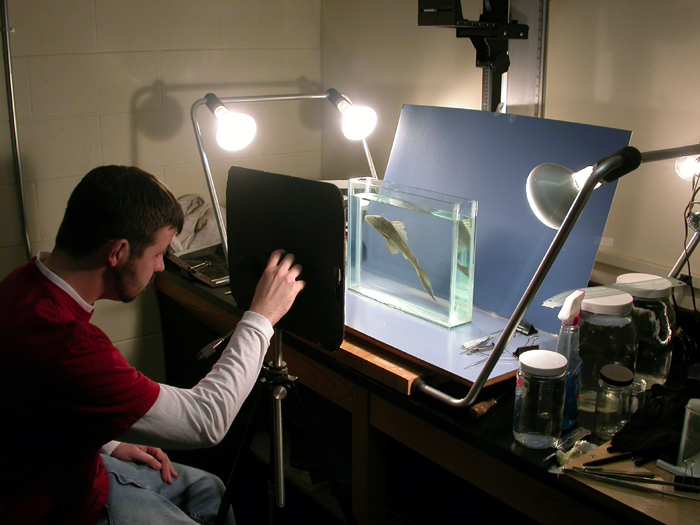
Kyle shooting a larger specimen (ca. 250 mm SL). Note camera is mounted on a full-sized tripod.
|